William Henry Fox Talbot, 1800-1877, was a gentleman scientist that was interested in optics, chemistry and art. He experimented with contact printing as early as 1834, however, did not publish his results until Arago's announcement of Daguerre's discovery.
As he followed in the footsteps of Thomas Wegwood (1771-1805) so did Sir John Herschel continue Talbot's experiments, exploring many material and processes, such as anthotypes (previously blogged).
Talbot, frustrated with the limits of sketching with camera lucidas, he set off to discover a more permanent way of capturing images. After experimenting with a wide range of materials, he discovered photogenic drawing using silver nitrate and salt.
Photogenic drawings are "prepared by soaking a piece of good quality drawing paper in a weak solution of common salt, allowing this paper to dry, brushing it with a solution of silver nitrate, and then further washing it in a strong solution of common salt" ( (c) Museum of the History of Science, Broad Street, Oxford, England). You would then expose this image to sunlight until you got an image. You would then need to fix this image; Talbot used a strong solution of common salt. Herschel, on the other hand, discovered hypo fixer, a sodium thiosulphate solution, that dissolved away any remaining silver nitrate and stopped the reaction.
All this can be found at the Museum of the History of Science website here.
Links: Web pages, Articles and videos so you can learn more.
Oxford Museum of History of Science, http://www.mhs.ox.ac.uk/features/ephotos/pdtypes.htm.
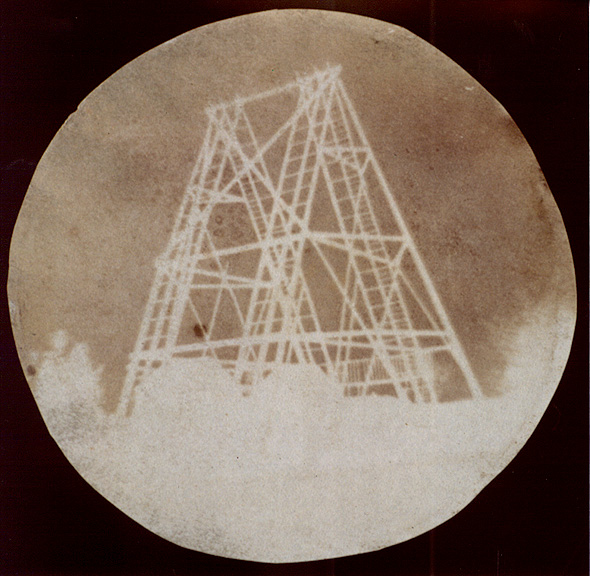
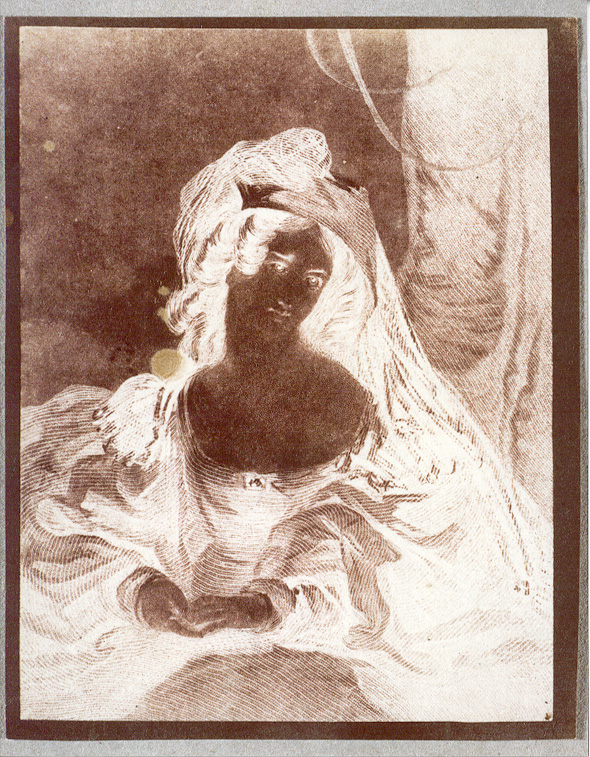
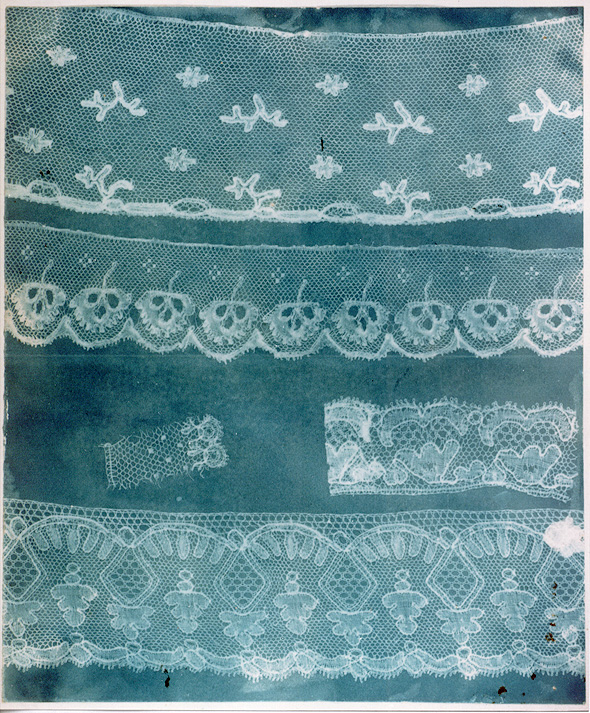
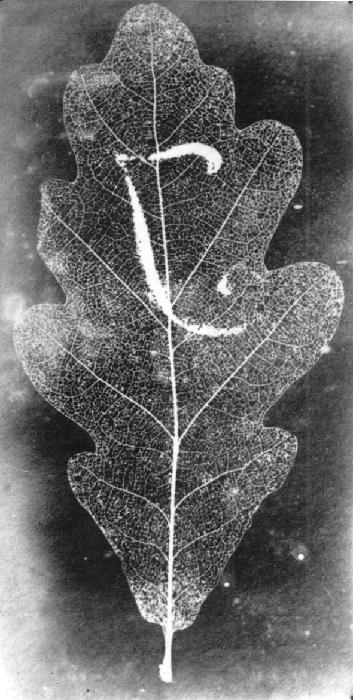
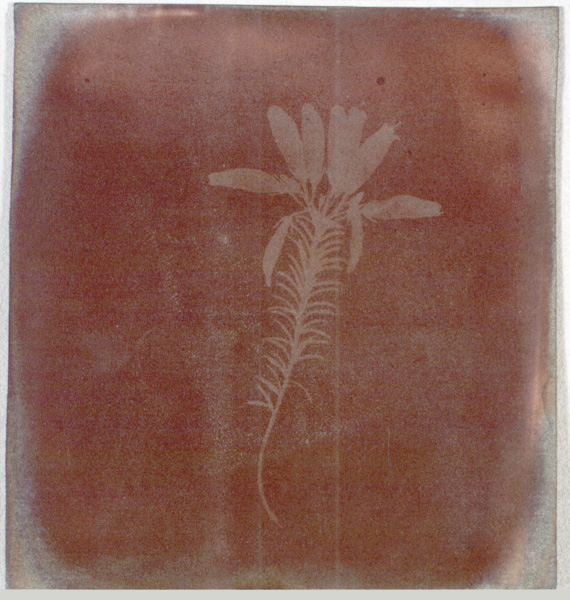
Here are some examples of photogenic drawing, from the Oxford website above.
This website give you a nice timeline of the history of photogenic drawing as well as tell you how to do it (which will be explained in the next section.)
Describe process, How to do it yourself.
Process as described here. (Same as site directly above.)
- Soak writing paper in a weak solution of sodium chloride (common salt).
- When dry, sensitise the paper by brushing one side with a strong silver nitrate solution. This causes silver chloride to be formed on the surface of the paper.
- Take the photo while the paper is still wet. An exposure of at least an hour may be needed. This will imprint an image on the paper.
- Remove the paper from the camera and wash it.
- Stabilize (or 'fix') the image on the paper by soaking the paper in a strong solution of sodium chloride. This produces a negative image on paper.
- Treat a second sheet of paper with salt + silver nitrate, as above.
- Lay the negative created above on top of the newly-coated sheet of paper + expose to light.
- Wait for a positive image to emerge then fix as above
What we did in class
- Create the solutions of salt and silver nitrate. Create a 2% and 5% salt solution and a 5% and 12% silver nitrate solution by mixing silver nitrate and salt with distilled water. You should use gloves, goggles and a lab coat to protect yourself, especially around the silver nitrate
. - Get your paper ready. I used bristol for mine, though other used tracing paper, rag paper, and water color paper. The type of paper you use will determine certain aspects of your finished paper. The solutions themselves may react with the chemicals and byproducts in the paper and the surface texture of the paper will determine how clear the image is
. - When you have your paper, you will want to take all four sides to a flat surface. Since we were experimenting to determine which solution and paper type would be best for this project, we divided the paper into four different sections. One would have one coat of 2% salt with two coats of 12% silver nitrate; another section had one coat of 2% salt and one coat of 5% silver nitrate; another one coat of 5% salt and two coats 5% silver; yet another had one coat of 5 % salt with two coats of 12% silver nitrate
. - Writing down what each section would have, you first apply the salt solution. We only applied this layer once
. - We then took a hairdryer and dried the salt
. - We them moved onto the silver nitrate. Using a dropper, we placed some solution on the paper and used a spongy brush to evenly distribute it
. - You dry it again, and if necessary, apply a second coat and let that dry as well
. - You then take objects or negatives, whatever, place them on top and expose it to the sun
. - You will see as the color of the paper changes from white to a very dark brown. Once you believe enough time has passed you bring it back inside and fix it
. - In keeping with Talbot's tradition, we used a bath of strong salt to fix it, though since it is not a permanent fix, the silver nitrate will still continue being photo sensitive, so you should keep away from light
. - You're done! Go show it off and make your friends jealous.
My experience, i.e. What I did
I followed the in class instructions (as described above) for my project. It was a bit difficult since there were many people using the same solutions at the same time. It was also confusing trying to remember which bit of paper had which percentage of salt and nitrate and if you had already applied that second coat. Other than this small inconveniences, the project went rather smoothly.
I am a bit disappointed that after the salt bath the image did not retain the same darkness it had when exposed to sunlight for a long time. Other than that, I am quite happy with how they came out

Above: That's my notebook that I use to take notes.
And that brown spot is where I got some silver on
it, probably through the gloves.
The moral is: be careful with this stuff, it
gets everywhere.
 | ||
Above: That's my thumb. I don't know how I got
silver on it since I was wearing gloves,
but you can see the dark part where it's reacting.
Again, be careful when handling these materials.

Above: The picture above is the photogenic drawing
my lab partner, Erica(sp?) made.
You can see where it got really dark when exposed to light.

Above: Those would be mine. I rather like how they came out,
though they were more purple before the salt bath.

Above: Pictures in the salt bath.

Above: A fellow lab partner's (sorry, I forgot your name) project.
You can see how dark they got, but they'd get lighter in
the salt bath. She used watercolor paper.

Above: The professor said not to use tracing paper since it's
kind of waxy, and the process wouldn't really work out
but this guy (Sorry, forgot your name too) decided
to go and use tracing paper anyway and it came
out rather nice.

Above: Erica's "drawing" before the salt bath.
She used 100% Rag Cotton Paper.

Above: My "drawing" before the salt bath. I used Bristol paper.

Above: Watercolor and tracing paper out in the sun.

Above: My pictures out in the sun.

Above: Erica's and my pictures out in the sun. You
can see the snow in the background and it
was actually snowing a little that day.

Above: My "drawing" before exposure to sunlight.

Above: Our (Erica and I) prepared papers before
exposure to sunlight. You can see that even in low
lighting, the paper still got dark in some places,
especially the 100% cotton rag, though
that may have been more about the strength of our solution.

Above: The 100% Cotton Rag paper reacting to light
before exposing it.

Above: The papers are drying and reacting even in the low light.

Above: We used a hairdryer to speed up the drying process in
between layers.

Above: Our paper, taped down, marked an ready to be
salted.

Above: Mixing the silver solution until all the Silver
Nitrate is gone.

Above: My paper of choice was Bristol.

Above: The beaker we used to measure the water.

Above: The silver nitrate and distilled water solution
being stirred. You can see the silver at
the bottom and the blur where
we stirred it.
Misc, as in some other stuff I want to show you.
Hiroshi Sugimoto, check him out at this website. He's a contemporary artist who used photogenic drawing. He also took some of Talbot's originals, and exposed them, giving the world an even greater glimpse into the man and process.
Example of Sugimoto,


